I had mentioned my simple two ingredient Flaxseed Gel (FSG) that I usually use whenever I am travelling/away from all my extra goodies at home; in a video I made about all my favorite DIY’s/Store bought products (while travelling) and was asked to share the recipe, so here it is!
This recipe is honestly one of the simplest gel’s I make and while it doesn’t involve a lot of ingredients, it is still packed with nourishment for the hair AND still does an excellent job at providing shine, definition and hold (without any crunchiness).
I have a few videos and posts about other FSG recipes that are more intricate and involve a lot more ingredients hereand even aprotein FSG to make a strengthening Gel). They also include more details about the benefits of using FSG for the hair (you know I have to give props to the fact that this gel is ALL natural, doesn’t include any chemicals and actually provides nourishment to the hair)!
So let’s get to the good stuff!
Ingredients/Tools:
1/2 cup Flaxseeds
2.5 cups Rosewater (reserve 1/2 cup for after boiling)
3 teaspoons Almond oil
Pot
Spatula
Container
Pump bottle
NEW stocking cap
Additional/Optional Ingredients:
Instead of Rosewater, you can use plain water and/or a combination of both (Rosewater has been my go to because of its nourishing benefits for the hair and skin). In place of Almond oil, you can use any carrier oil of choice.
Method:
In a pot, I start by adding the Flaxseeds to the Rosewater, making sure that all of the seeds are submerged. Slowly allowing the water to form a gentle rolling boil on low-medium heat, while stirring, till I have the consistency of egg whites. I let the gel cool down completely to room temperature (the seeds still in the gel). I add the additional 0.5 cups of Rosewater to the gel and seeds, while in the pot to make it easier to strain the gell from the seeds. I add the oil to the gel, stir really well so that the oil and gel combine and then transfer into my pump bottle.
Additional Information:
FSG has a relatively short shelf life in general and should ALWAYS be stored in the fridge, especially since I don’t use preservatives, nor do I add ingredients that help to extend the shelf life in this particular recipe (to keep it simple). I ordinarily do eg Essential oils and Vitamin E oil. It is best to keep the gel in the fridge for no more than 2 weeks. An alternative option is to freeze the gel in an ice-cube tray and then when ready take out a few FSG blocks to defrost and use. You can reuse the Flaxseeds by storing in a container/airtight zip lock bag.
I would love to hear what you think of this recipe Maicurlies!
I am back with an update version of my frozen henna bars. This recipe consists of some new ingredients and some of the old ingredients in my previous recipe.
If you have not used Henna or ayurvedic herbs before, I highly recommend that you research them first, before applying onto you hair! While they are natural and a healthy addition to incorporate into your hair routine (providing strength, shine and so much more, with henna being a great natural way to add a red/reddish orange undertone to the hair) it is always best to be informed. I have a little breakdown of Henna along with some of the other ingredients I use here.
Before I get asked the infamous question of “will it make my hair red”. The answer is yes and no. It totally depends on the colour of your hair before applying henna. If you have black or dark hair, you will notice a subtle red undertone to the hair which is more noticeable under direct sunlight (not really visible indoors). If you have light brown hair, you will notice a reddish brown undertone to your hair and if you are blond, you definitely will get an orange tint to your hair. For grays and white hair, you will get a golden orange/fiery orange tone to your hair. (Ps. there are a variety of henna “species” which means that the type/location to the plant you can get, you can get a verity of dye intensity).
In case you want to tone down that orange tint (for those with gray/white hair) – naturally – Indigo is the way to go. Indigo is used to give a final black tone to the hair. You can either do a two step process of first apply henna followed by Indigo (most optimal for stubborn grays) or you can do a 50/50 combination of mixing henna and Indigo which will give more of a dark brown tone. Amla helps to provide a slightly brownish tone to henna and hibiscus will give it a kick of red. I personally have never tried Indigo myself but you can inform yourself about it along with an really in-depth look about all the herbs here at hennasooq.com
PSA: It is ALWAYS required to do a strand & skin test to make sure you are not allergic to henna or any other herb you use on your hair. I will also stress the fact that natural pure henna (good henna) only comes in one colour: Reddish orange. There is no natural brown henna, black henna or anything else. If you find that it is either one of two scenarios: it’s a blend of henna along with indigo, amla, hibiscus etc. so it will have other ayurvedic herbs mixed together (which is fine as long as it only contains natural herbs). Or it is unnatural “natural henna” which, can be harmful potentially containing harsh chemicals which, can damage the skin & hair. They can cause allergic reactions, burns and even lead to death in some cases (those that experience an allergic shock) so as I mentioned PLEASE make yourself aware of what you are applying.
Property of Maicurls – Frozen Henna Bars
Now with all that mentioned, here is my updated recipe. I am keeping it simple and effective.
Ingredients & Tools (Makes five 100 gram bars 3.5 oz.) – 500 grams total 17.6 oz.
1.5 cups Henna
1 1/4 cups Rosewater
1/4 cup Ghassoul/Rhassoul
1/4 cup dried Hibiscus petals
1/4 cup dried Rosebuds/ petals (optional)
1/4 cup Amla
1/4 cup fresh Aloe Vera Juice
Bowls
Sieve
Spatula
Pot
Gloves
Lining (to protect worksurface)
Silicone molds (any container)
Clingfilm
Airtight container
Additional/Optional:
Instead of pure Rosewater you can either do a combination of water & Rosewater or just stick to plain water. The Rosebuds are not a requirement but I love adding Rosebuds for the additional Rose benefits. Hibiscus is the acidic element for dye release (along with the Amla powder which, is also acidic) but you can use Hibiscus tea or any other tea. You can add other ayurvedic herbs to the paste, I’ve just been keeping it simple.
Method:
I add the Rosebuds and Hibiscus petals to the Rosewater which I heat up (I do not boil the water) and allow the petals to seep. I combine and mix all the powders together so that everything is well combined before adding the liquids. I pour the Rosewater through a sieve first and then pour the Aloe Vera Juice to the powders. (Slowly) add the Rosewater to the powders and mix. Once everything is well combined, cover the paste with clingfilm and allow for dye release to start. (Everyone’s henna starts releasing dye depending on the type of henna you have, for me, right before 5 hours is when it starts to kick in for my henna). Transfer the paste into molds, cover each mold with clingfilm and freeze. Once the bars freeze transfer into an airtight container and wrap each bar with clingfilm to preserve them.
Additional information:
I will mention that I like the henna paste to be thick because when I “melt” them for use, I put the bars in a bowl with a little heated up hibiscus rosewater which, will help to melt down the bars. I prefer not making the bars too runny prior to freezing because frozen henna bars tend to be a little more runny after they have thawed anyways. But that is totally a personal choice, so if you prefer to start off with a runnier paste all you have to do is add more liquid to the recipe.
You can store the bars in the freezer for up to 4 months (some say 6) but I tend to use them up before 2 months and just remake fresh batches. (I use 2 – 3 at a time).
Would love to hear what you think if you give these a try!
I was contacted by a company called Regrowzthat produce an all natural scalp homeopathic system to help stimulate hair growth & regrowth.
Regrowz is based on ancient Ayurvedic medicine that includes about 30+ plants and herbal ingredients. The recipe is specifically formulated to prevent, stop and reverse the effects of hereditary hair loss in both men and women. It is designed to help with scalp stimulation in order to help grow and regrow hair and should be focused on the area/s affected with slow/no growth.
Regrowz can either be used for 3 months – 6 months (depending on your personal needs) and has developed to be used for both women and men but both are said to be effective in the same way.
The Regrowz Scalp Stimulant is developed to help open the pores (in areas where you have experienced hair loss) and is the first step to preparing the scalp to receive the Restoration Serum (step 2). The comb attachment acts as a deep exfoliant, cleansing the scalp of the hormone Dihydrotestosterone (DHT) which is contained within the natural oil produced by the scalp (sebum). It should be left on the scalp for a 30 minute period before applying the Restoration Serum (without rinsing it).
Similar to the Scalp Stimulant, the serum should be focused on the scalp itself and massaged for 1 minute and then left on for a minimum of 60 minutes to overnight (by covering the hair with a shower cap/plastic bag in order to avoid staining). It is said to have been effective in 100% of those that have used the serum and clinical studies of those that participated reported a 39.41% reduction in total hair loss with up to 44.90% individual reduction for some.
After 60 minutes – overnight the products needs to be washed out of the hair with shampoo. This system is most effective when used frequently (every other day is best).
I was given a discount code: 10caregrowz46 that can be used upon checkout on Regrows.
I plan on monitoring my progress in my crown and back of head area since my crown seems to grow the slowest and the hair on the back of my neck experiences more tension/friction while wearing my hair down, using a scarf or putting it up in a ponytail. I shall be using Regrowz for 3 months and will do a 1.5 month update as well as after 3 months.
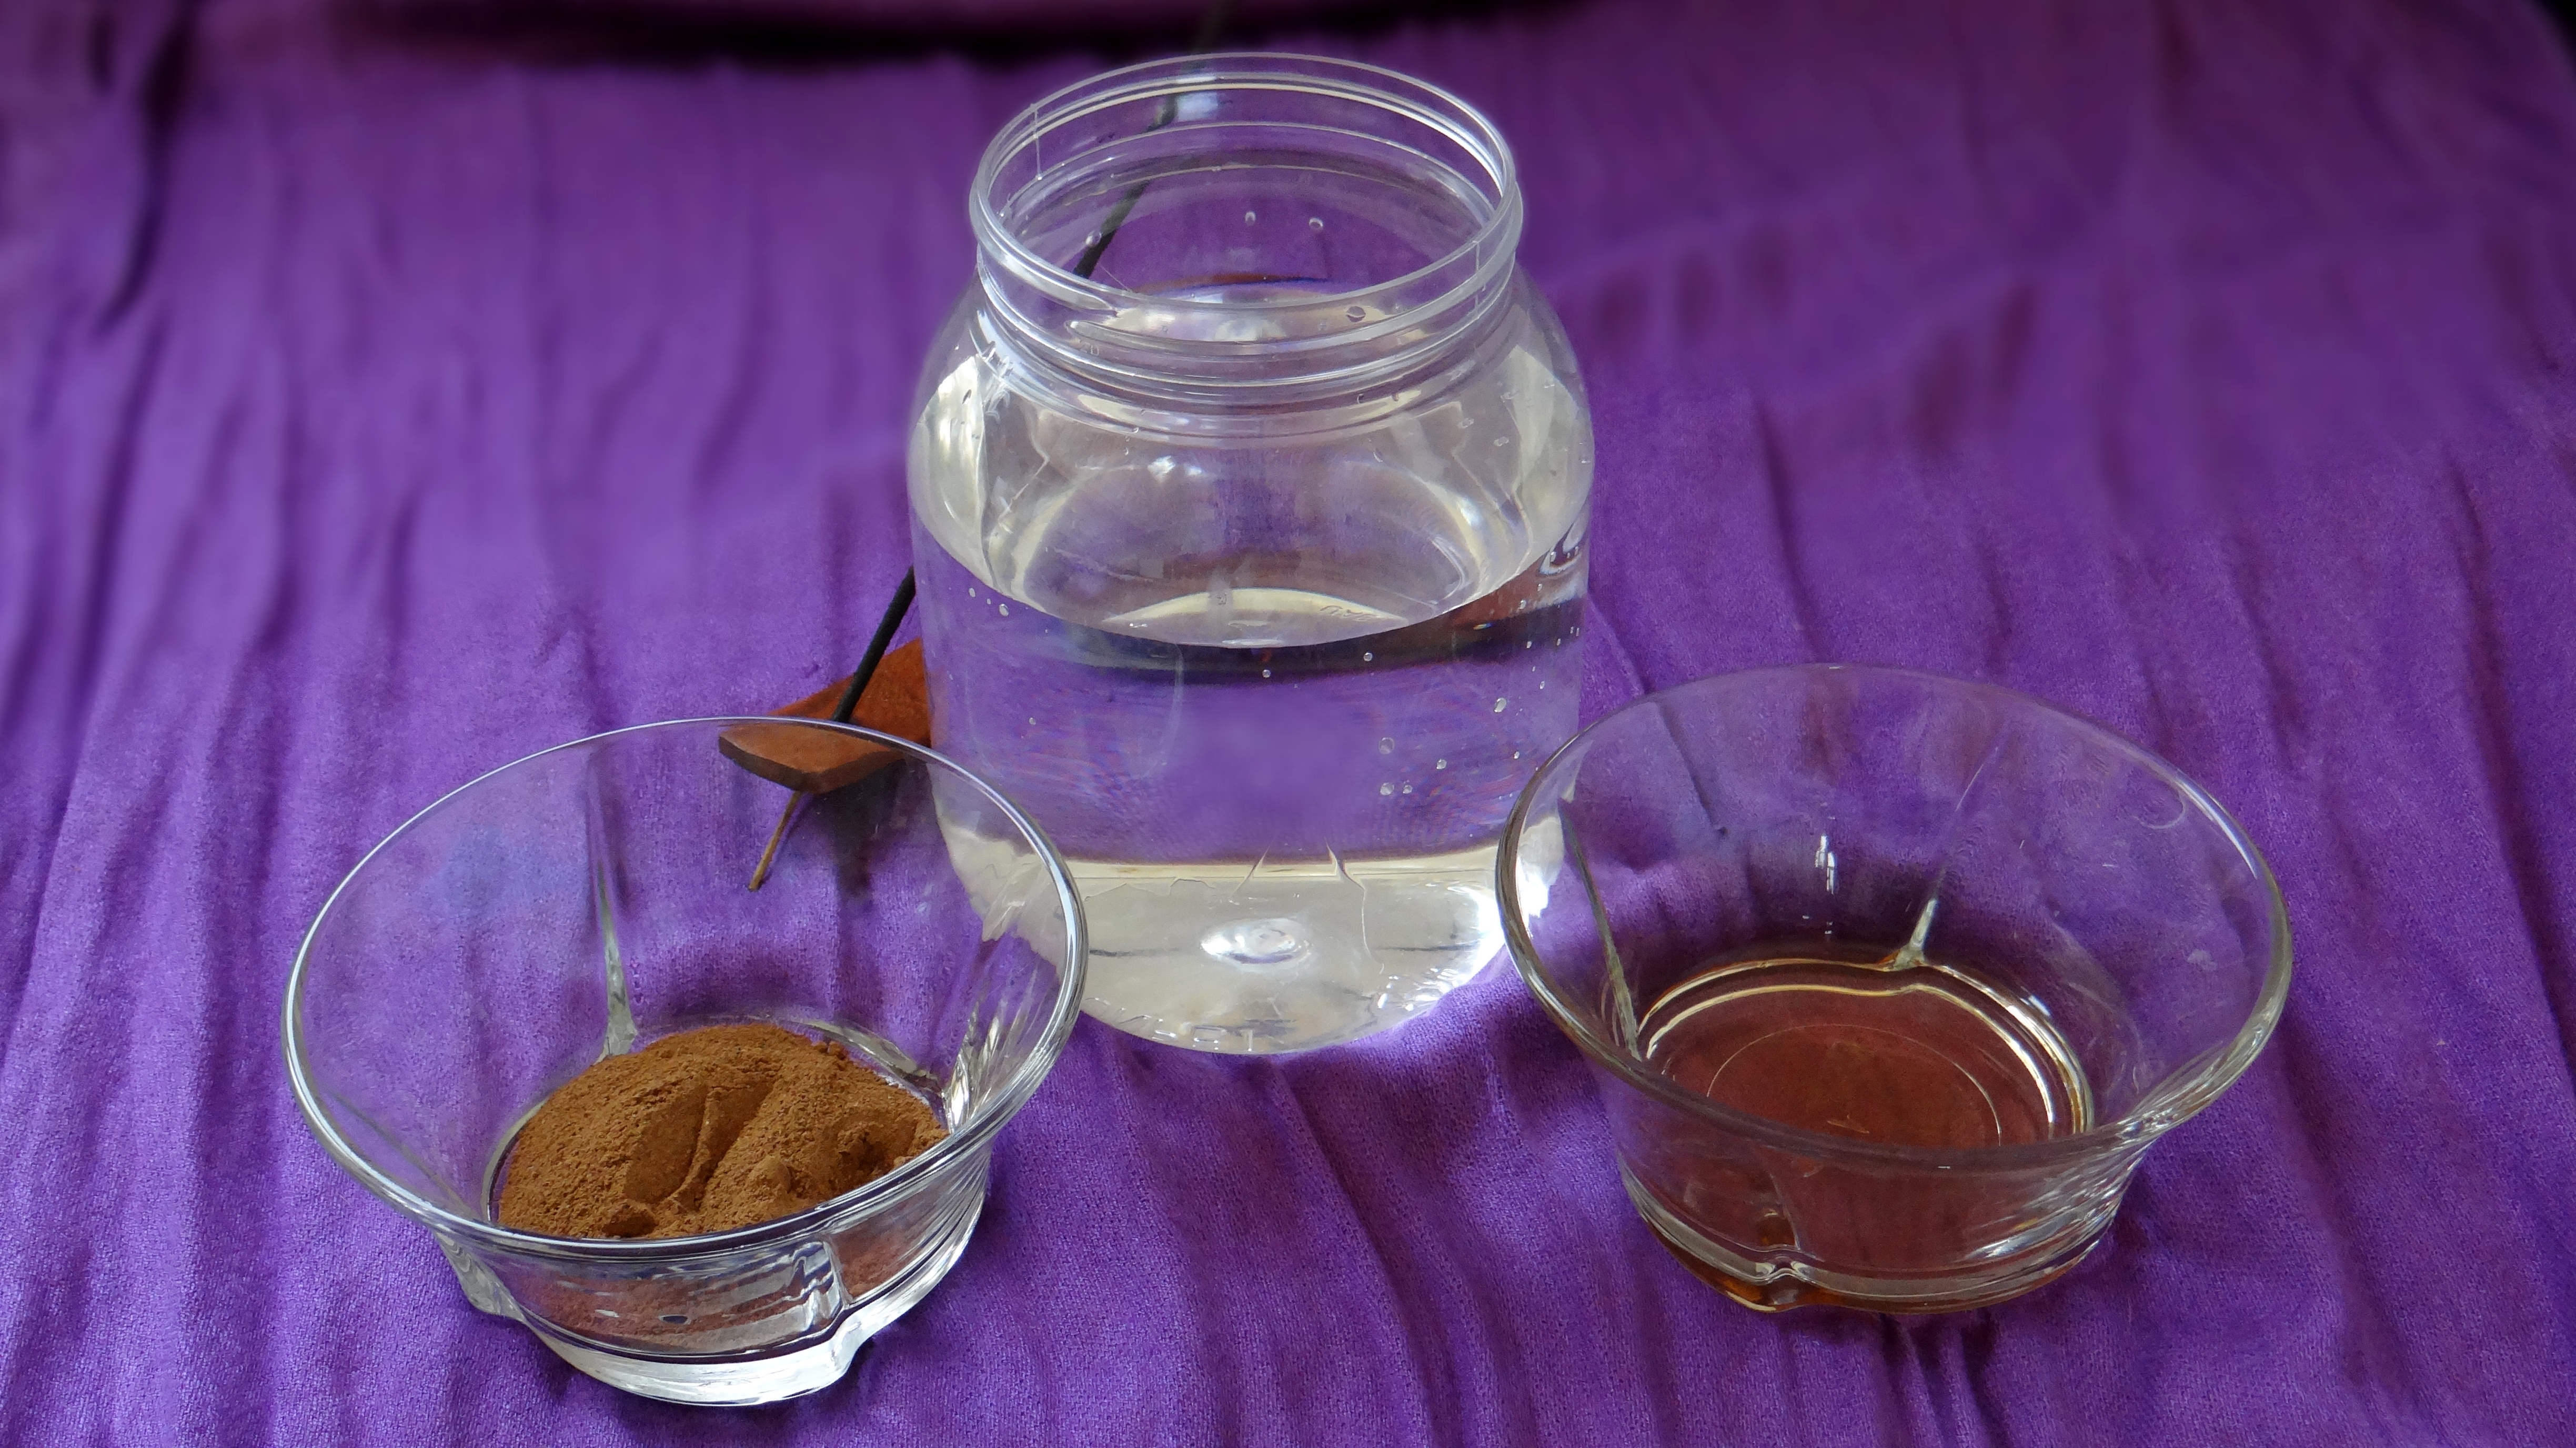
But first let me share a little information about the Clay:
Ghassoul Clay is derived from deposits within the Moroccan Atlas Mountains. It is an organic byproduct created by the natural geothermal process of volcanic activity. Aside for being known as Ghassoul is is also more commonly referred to as Rhassoul Clay (but is also known as Red Clay, Red Moroccan Clay or Oxide Clay).
Side note – this clay can be used on both the hair and skin, so yes, I shall also be sharing a DIY Face Clay Mask Recipe (soon to come).
Benefits of Ghassoul Clay:
Cleanses the hair – removes impurities, leaving the hair bouncy and voluminous.
Cleanses the scalp – heals the scalp from irritations by removing impurities to detox and cleanse the scalp.
Softens the hair – due to it’s cleansing properties it removes product build up and toxins in the hair that helps to soften your curls.
Nourishes the hair- due to it’s natural properties, it provides the hair with natural minerals.
Reduces flakiness – while it cleans the scalp it doesn’t strip the skin of natural oils like some shampoos can so it doesn’t leave the scalp dry or irritated.
Clumps the curls – it’s nourishing properties leaves the hair healthy which allows curls to clump and “pop”.
Ingredients:
2.6 oz (1/3 cup) Ghassoul Clay
6 oz water*
0.6 oz Apple Cider Vinegar (ACV)**
0.2 oz Coffee Infused Almond Oil
0.2 oz Vegetable Glycerin (optional)
2 capsules Vitamin E Oil
5 drop Peppermint Essential Oil (optional) ***
Alternative Ingredients:
* You can do 50/50 water & rose water. Add less liquid versus powder if you prefer to have a paste consistency.
** Apple Cider Vinegar can be replaced with Aloe Vera Juice (AVJ).
*** Essential Oil (EO) is optional and should not be used if you are pregnant. You can use any EO of choice.
Mixing:
I prefer using the container I use to apply my clay to mix (a nozzle tip applicator bottle) to avoid the clay from flying around (the powder is very light weight and can get carried around by air easily).
I first add the clay (with the help of a funnel to avoid spilling) and then pour in the the water. The next step is to add my ACV. When you add the ACV or AVJ you will notice that the clay mix starts to foam up and rise, this is normal and due to the pH level of the ACV or AVJ with the clay. I then make sure the clay is well mixed by putting on the nozzle cap and shake the container really well and then add the remaining ingredients and give it one last shake. That’s it!
Application:
My preferred consistency of this mix is to have it more runny versus a paste (just personal preference, a paste works just as well.). I apply onto damp hair while in the shower to avoid making too much of a mess because the clay will drip. I start from the ends of my hair to my roots making sure each strand is covered and that I have the clay treatment on my scalp as well. I leave it on for roughly 15 minutes covered with a shower cap or plastic bag before rinsing and deep conditioning. I tend to apply this mix when my hair needs it, I can tell when my hair looks “tired” eg. my curls aren’t popping, looks dull or isn’t absorbing my leave-in conditioner as normal (usually happens with product overload/hair coated with ingredients that just sits on the hair). Please note: it can get messy with the clay treatment, regardless of if it’s runny or a paste).
I would love to hear if you use Ghassoul Clay (or any of the other names it goes by). What’s your recipe?
My Wash-n-Go started with my wash day process where I first used the Strengthen Shampoo:
Photo credit Revlon Realistic USA
1. Cleansing Using about 4-5 pumps of the shampoo after damping my hair with water (I wash my hair in sections) I focused on my roots and scalp first in order to remove product buildup, sweat, dirt etc. Using my finger tips I gently massaged my scalp and worked the shampoo. I also used my scalp massage brush to help lift product buildup and sweat from my scalp. I added another 3 pumps of shampoo onto my roots and scalp before working the shampoo on the length of my hair. It smells divine and had a little bit of slip to help detangle (however, I did not necessarily focus on detangling while using the shampoo that came later). I have always had a hate hate relationship with shampoo because from past experience they have ALWAYS left my hair feeling dry and stripped. However, this shampoo did neither! It lathered up a little bit and left my hair feel clean without stripped of natural oils produced by the scalp. It basically left my scalp and hair feeling clean without that typical “squeaky clean” feeling I have experienced in the past. In terms of shampoos, this definitely has been one of the best I have personally used.
Photo credit Revlon Realistic USA
2. Conditioning: After shampoo-ing I moved onto their Strengthening Conditioner (Intense Moisture). I struggled getting the conditioner out of the pump because it is really really thick which, is something I had anticipated when I did my initial review of the box (check my previous post). I ended up removing the pump and just squeezed the conditioner out of the container. I worked the conditioner from ends to roots since the ends of our hair is the oldest and driest parts so I focus on that first. I am very heavy handed with conditioner because this is when I really finger detangle and remove shed hair (using my fingers as a comb – I no longer use a comb while washing my hair). This conditioner melted into my hair, despite being really really thick. I had anticipated that it would sit on my hair but I was proven wrong! It basically dissolved. My curls were left detangled, soft, moisturized and clumped together. I absolutely loved how hydrated my hair felt after using the conditioner. I was left with a normal amount of shed hair (for me) as I would on any other wash day. I left the conditioner on with a shower cap for 10 minutes (as per their instructions) and then rinsed it out.
Photo credit Revlon Realistic USA
3.Moisturizing For the Wash-n-Go process I first moisturized my hair with their Strengthening Butter Creme Leave-in Conditioner. This is the thickest Leave-in Conditioner I have ever applied on my hair! I was actually a little worried that it might just coat my strands because of the thick consistency of the product, especially since I have fine strands. I also wasn’t sure if my curls would be weighed down due to the product just sitting on top of the strands instead of being absorbed but I yet again was proven wrong! My hair literally drank up the Leave-in! It did’t sit on top of my hair, it practically melted into int nor did it leave it feeling greasy in any way. I really put it to the test by applying A LOT of Leave-In. It smells amazing and left my curls moisturized, soft, shiny, hydrated and clumped together. After applying the leave-in is when I go for my wide tooth comb to make sure I have gotten rid of all tangles and shed hair (my comb was free of shed hair at this point).
Photo credit Revlon Realistic USA
4. Defining:To define my Wash-n-Go I used the Strengthening Curling Custard. This is another product that is thick in consistency however, it has more of a cream texture compared to the Leave-In. This product helped to enhance my curls, clumped each strand and also left my hair smelling amazing and looking shiny. It didn’t leave it feeling coated nor did I have a “crunchy” after effect on my curls. I was left with fluffy, frizz free, bouncy hair that had body, movement and definition.
Final Verdict:
Overall, I loved the results of my Wash-n-Go, from cleansing right down to styling. I was impressed with how well my hair absorbed the products without feeling weighed down nor product overloaded. My hair had volume while having little to no frizz (I went to town with my Afro comb because I LOVE lifting my roots to create MORE volume). My curls were defined, soft, shiny and hydrated.
Initially I did wish that the line included some kind of oil since I am used to applying one after moisturizing my hair however, I think that since both the leave-in and the curling custard include oils such as: sweet almond oil, black cumin seed oil, olive oil, argan oil, coconut oil and even Shea Butter & Cocoa Butter, I think for someone with fine hair such as myself the oils included in the products are sufficient. (I don’t know if those with thicker hair strands (coarser) hair would feel the same). I would have liked to see a Deep Conditioner in the product line because my wash day usually includes deep conditioning on a weekly basis. Maybe that will be added at some point.
Other than that, I enjoyed using the line & look forward to trying the other styling product I received when I do a Bantu Knot-out!
Let me know if you have ever tried Revlon Realistic Black Seed Oil and what you thought!
I did a poll on my YouTube Channel (click on the link if you haven’t already) to see what I should share next and my DIY Whipped Sugar Scrub got the most votes, so here we go!
Sugar scrubs can be used on the body and face to remove dead skin cells while promoting new glowing skin. It can help reduce bumps, blemishes, fade scars, reduce dark spots, clean up pores and promote healthier skin overall. Before delving into the details please not that I highly recommend only using brown sugar versus refined white sugar because the granules of brown sugar are less coarse and harsh on the skin, thus will not tear or cause damage. When using the scrub on your face, I suggest applying it no more than 1 – 2 times a week (daily use would be excessive). When it comes to your body, alternative days (works for me) however, I once again suggest daily use would be excessive.
Ingredients:
3 oz Mango Butter
0.6 oz Almond Oil
0.2 oz Lemon Juice
3.6 oz Brown (Cane) Sugar*
3 oz Raw African Black Soap
12 drops Peppermint Essential Oil
*I suggest using equal amounts Sugar to Butter and Oil, this way it won’t be too runny or hard on the skin.
Ingredient alternatives:
Mango butter can be replaced with another soft butter however, I highly recommend only using a soft butter that is not overly greasy. Almond oil and Peppermint Essential Oi (EO)l can be replaced with any carrier oil or EO of choice. (EO can be omitted altogether and should be in case you are pregnant)!
Ingredient benefits:
Mango butter is rich in fatty acids, antioxidants and contains anti-inflammatory properties. It contains vitamins A, C and E and is known to help ease skin conditions such as acne and eczema. The butter is effective in moisturizing dry skin and is said to help reduce the appearance of fine lines.
Almond Oil contains vitamin E and helps promote smooth, soft and supple skin. It is effective in keeping dry skin moisturized and known to help ease itchiness, reduces redness, relieves inflammation and can help skin conditions such as psoriasis and eczema.
Brown (Cane) Sugar works at exfoliating the skin by removing dead skin cells, clearing out the skin’s pores, removing dirt as well as excess oils. It contains glycolic acid, which, is an alpha-hydroxy acid (AHA) that is known to help maintain healthy skin. Due to its exfoliating properties it can reduce the appearance of scars and dark areas (e.g. dark underarms, elbows and knees).
Raw African Black Soap contains anti-fungal, antibacterial and cleansing properties for the skin. It can help reduce the overproduction of oils (and in this mix will help maintain a level of oil and butter). It is moisturizing for the skin while soothing, it reduces irritations, blemishes and fine scars.
Peppermint Essential Oil Peppermint Oil has a soothing and cooling effect on the skin that leaves it feeling tingly and fresh. Its anti-bacterial and inflammatory properties is known to help fight acne and skin irritations. It is also known to help with blood circulation in the skin.(*Never use undiluted EO on the skin as it can lead to burning and itchiness).
Mixing Instructions & Use:
You want to place the butter, oil and lemon juice in a bowl and mix with a whisk for a few minutes until everything is well combined. light and fluffy. Fold in the sugar first before using the whisk in order to avoid sugar granules from being flung around the kitchen (it can get a little messy). The final step is to add in the Raw African Black Soap which, you need to grate first in order for it to be well mixed and distributed evenly in the scrub. Essential oil can be added as the last step (if used) and then the mix can be transferred into a disinfected airtight container.
When it comes to applying the scrub, please ensure that you have anti-slip stickers in your shower in order to avoid potentially falling (it can get really slippery). You want to start off with damp skin (for both your face and body) and gently using your fingertips rub the scrub onto your skin in circular motions (be gentle). You can rinse your body with a body wash post scrub (if you feel like you have too much butter/oil present and a face wash for your face). Please ensure that you use a dry and clean spoon to scoop out the scrub (don’t use wet fingers otherwise you are inviting bacteria growth) and make sure to close the lid. Once used always store the scrub in the fridge to help ensure it remains fresh for as long as possible.
So, that’s it! If you use this mix, please do let me know what you think and if you have any suggestions on what you would like me to share, let me know!
I hope this post finds you well! I am excited to share this one with you.
This one is all about my first impression upon unboxing the Revlon Realistic Black Seed Oil line!
So before I even begin, I need to first say THANK YOU to both Revlon Realistic USAfor their product line which, I was sent by Brown Girl Bloggers. THANK YOU so so much!!!
I was sent an email with a link to sign up to receive the products through Brown Girl Bloggers (I was following them before that happened) and that’s how I actually was introduced to Revlon Realistic USA. One of the reasons why I opted to try the products is because it is designed for and caters to natural hair! If you have been following me for a while, you’ll know that I have been all about that DIY life after a couple of months of being fully natural (and still am). But one of the main reasons why I did was because I do not have access to all the well known international natural hair brands locally because the market here caters to other ethnic hair types. SO, if I happen to find something “commercial” or store bought that caters towards natural hair and catches my eye, I will try it! In case you are interested in trying the products yourself, I suggest checking out both Revlon Realistic USAandBrown Girl Bloggers. That’s the back story.
Photo credit Revlon Realistic USA
Before I get into it: while I was sent these products to try out, I have no issue what so ever to state exactly how I feel or what I think when I have tried products/ingredients that did/didn’t work for me so all opinions stated below are all my own and are HONEST!
Ok let’s get to the good stuff shall we….
Photo credit Revlon Realistic USA
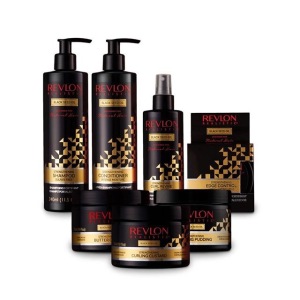
I was sent a total of 5 products in my box along with a really cute T-shirt (I got to pick the size and opted for small which, fits perfectly), a comb set (a rat tail and wide tooth comb) and a really cute fan! As I write this, I have yet to try the products but I wanted to share my initial thoughts/impressions on the products in terms of ingredients, consistency and scent.
Black Seed Oil Product line
Revlon Realistic Strengthening Shampoo
Photo credit Revlon Realistic USA
For those of you that have followed me for a while, you will know that I usually do not use commercial/store bought shampoo. Most of my experiences with commercial shampoo has been less than pleasant (at least the type of shampoo we have available locally which again, isn’t necessarily catered towards natural hair). So I have stayed clear of it for a while. Instead, I normally reach for an Apple Cider Vinegar (ACV) rinse, shikakai or Raw African Soap. I am however, intrigued to try this shampoo because of the fact that is catered to natural hair and also because of the fact that some of the ingredients in the shampoo are nourishing and makes it sound like it won’t be stripping. Here are some of the ingredients:
Glycerin
Nigella Sativa (Black Cumin) Seed Oil,
Plukenetia Volubilis (Sacha Inchi) Seed Oil
Argania Spinosa (Argan) Kernel Oil
Cocos Nucifera (Coconut) Oil
Prunus Amygdalus Dulcis (Sweet Almond) Oil
When it comes to the scent, this shampoo has a really light citrus smell with that familiar cleansing shampoo scent but it is subtle. The consistency of it is slightly creamy which, makes me believe it might provide a little slip (still have to put it to the test) along with it being nourishing (versus stripping like normal shampoos) because of all the oils and moisturizing ingredients (stay tuned for my next post about this line where I will use the shampoo).
I had to jump right in to that part of the consistency of the conditioner because it is THICK! When I pulled the pump off to get a look at the consistency and scent; there hardly was any on the pump itself because of how thick it is! Yes, it was that thick (take a look at my video below for my reaction). So I am anticipating how this will feel on my hair because I believe it will provide great slip because of the fact that it will coat the hair while providing moisture due to the ingredients:
Butyrospermum Parkii (Shea) Butter
Prunus Amygdalus Dulcis (Sweet Almond) Oil
Nigella Sativa (Black Cumin) Seed Oil
Plukenetia Volubilis (Sacha Inchi) Seed Oil
Salvia Hispanica (Chia) Seed Oil
Crambe Abyssinica (Abyssinian) Seed Oil
Cocos Nucifera (Coconut) Oil
Adansonia Digitata (Baobab) oil
Macadamia integrifolia (Macadamia) Nut Oil
The instructions on the bottle says to leave the conditioner on for 10 minutes before rinsing it out (which I shall follow) donning a shower cap. It has a really soft sweet scent to it. In all honesty by the time I got to smelling the conditioner I already was in love with the scent of their products.
This is another product from the line that is SUPER thick, it actually has a custard consistency. I am SUPER EXCITED to put it to the test because I have fine hair so I am interested to see if it will weigh my hair down or not. My hope is that my hair will be left moisturized, bouncy and shiny without being weighed down. It contains some really good ingredients as well such as:
Butyrospermum Parkii (Shea) Butter
Prunus Amygdalus Dulcis (Sweet Almond) Oil,
Theobroma Cacao (Cocoa) Seed Butter
Nigella Sativa (Black Cumin) Seed Oil
Cocos Nucifera (Coconut) Oil
Aloe Barbadensis (Aloe Vera) Leaf Extract
One thing about this product is that it includes cones. So, if you have been following me you’ll know that I usually do not apply cones on my hair for the simple fact that I don’t usually use shampoo. Shampoo is the only real way to remove cones from the hair and since I did get a natural hair shampoo with this line, I am willing to give the leave-in conditioner a try. (I shall be using the shampoo on wash days whenever I use the line in general).
Revlon Realistic Strengthening Curling Custard
Photo credit Revlon Realistic USA
The curling custard is a curl defining product that I plan on testing for a wash-n-go (I shall be sharing that via a YouTube video & blog post). The curling custard has a rich creamy consistency but is less thick than their leave-in conditioner. Every product in the line has a slightly difference scent to it and this one has a slightly different citrus smell to it in comparison to their leave-in but is equally divine. In terms of ingredients:
Glycerin
Butyrospermum Parkii (Shea) Butter
Prunus Amygdalus Dulcis (Sweet Almond) Oil
Nigella Sativa (Black Cumin) Seed Oil
Theobroma Cacao (Cocoa) Seed Butter
Olea Europaea (Olive) Fruit Oil
Cocos Nucifera (Coconut) Oil
Argania Spinosa (Argan) Kernel Oil
Aside from some of the ingredients above, the styling product does include cones as well. So, as with the leave-in conditioner, I shall be following up with their shampoo on wash day.
Revlon Realistic Strengthening Twisting Pudding
Photo credit Revlon Realistic USA
This is obviously a styling product that can be used for twist-outs along with other styles such as Bantu Knot-outs, braid outs etc to give you extra definition. The Twisting Pudding is the “lightest” product in the line in comparison to the rest that I received and also has a light citrus scent to it. Some of the ingredients are:
Glycerin
Nigella Sativa (Black Cumin) Seed Oil
Aloe Barbadensis (Aloe Vera) Leaf Extract
Bambusa Arundinacea (Bamboo) Leaf Extract
Glycine Soja (Soybean) Seed Extract,
Hydrolyzed Vegetable Protein PG-Propyl Silanetriol
This also happens to be another product with cones in them, so yes, it too shall be followed up with their shampoo on wash days after using it.
All products in the line have no mineral oil, no petrolatum, no sulfates, no parabens and no colorants. They have two additional products in the Black Seed Oil line that were not included in my particualr box: a Strengthening Edge Control and a Strengthening Curl Revive.
So as I mentioned I got 5 products in total and will be using them in combination to do a Wash-n-Go as well as a Bantu Knot-out that will be recorded. But first, take a peek at my unboxing video below where you can see each product (including the t-shirt, combs and fan) I received.
Once again I want to thank Revlon Realistic USA and Brown Girl Bloggers for my product box and I look forward to sharing my review and styling videos using the line!
I am BACK! (again lol) Let’s skip the wishy-washy and get straight into it.
Today I’ve got a new DIY recipe to share: Black African Soap Shampoo.
So as the name suggestions, it is a hair shampoo, it is all natural and yes, it is simple!
As with any commercial shampoo (which I personally don’t use) I use this to help cleanse my scalp from product buildup (my roots) and then I slowly work my way down the length of my hair. Previously I had been using Shikakai as a cleanser and I have nothing “bad” to say about it but I wanted a change and stumbled upon Raw African Black Soap.
What Is Black African Soap?
Black African Soap is traditionally made in West Africa from harvested plants such as sun dried dried plantain, cocoa pods, barks of Shea tree and palm leaves. Palm oil, palm kernel oil and water is also added to form the soap, which is left to “cure” before it is ready for use.
Black African Soap can be used for both your hair and skin ( I will have a separate recipes for the skin – I use it to cleanse my face). Some of the many properties of this soap:
Anti-fungal
Antibacterial
Cleansing
Reducing Oil productions (for overly oil skin since it does contain moisturizing properties to help balance the natural sebum produced by the skin).
Moisturizing
Helps sooth irritated skin
Reduces acne, blemishes and fine scars/lines
Recipe:
1 oz Raw Black African Soap.
8 oz warm Water (I use bottled water because my facet has hard water).
1 tsp Almond Oil
1 tsp Grapeseed Oil
1 tsp Glycerin Oil
5 drops Peppermint Essential Oil
5 drops Lavender Essential Oil
Ingredient Alternatives:
You can use any oil/oils you have at home, you must not stick by what I personally use. You can skip the use of Essential Oils (or replace them with your favorites) I like using Peppermint Essential Oil because it has a tingling effect on the scalp that helps to stimulate blood flow which helps to stimulate growth, it also has cleansing properties, anti-fungal & anti bacterial properties and smells AMAZING! Lavender Essential Oil has a relaxing and soothing effect. I add glycerin to my recipe because it is a humectant and while Black Soap has moisturizing properties on its own I don’t find it moisturizing enough so the addition of glycerin seems to boost that (but it is optional).
If you use Black African Soap, please leave me a comment below with your own recipe! I love learning and love sharing your recipes with my readers! And if you happen to try mine, please do leave me some feedback on what you think!
I am back with my videos and blog posts (finally). Figured it was time to share what my current hair routines look like since a couple of things have changed since I last recorded a DIY hair post (which has been forever ago).
I will be doing a “mini series” and to start things off I am going to share my DIY Ayurvedic Hair Cleanser.
(Optional) 5 drops Peppermint Essential Oil/any other Essential Oil (if you are pregnant please do not use any Essential Oil).
INGREDIENT ALTERNATIVES:
You can replace the Shikakai with Aritha Powder (review here). Aritha is too “harsh” (cleanses my hair too well) leaving it feeling stripped and “squeaky clean”, which is why I do not use it personally.
MIXING INSTRUCTIONS:
Combine all the ingredients together in a container and mix, that’s it!
APPLICATION:
I pour the mix over my scalp first and the roots of my hair and then slowly work down. Some of you might want to strain the mix with a cheese cloth however, it is not necessary. Once you rinse out the mix in the shower you should be left with clean, shiny hair.
I know, I KNOW….its been a minute, more like a few minutes, ok a WHOLE year! (hangs head in shame).
I let life get the better of me and dropped the ball on my blog…and I apologize sincerely. I do not have a good “excuse” other than I lost focus but I do promise to get back into it.
I wanted to start off by sharing some exciting news.
I am in the process of opening an online store! The name will be reveled once I have everything up and running (in my next post so you can connect directly to my store). But, yes, you read that right; a store is in the works! Over the past few, years many of you have been encouraging me to take this step and I am eternally grateful for the vote of confidence and support.
But before you jump up screaming “whipped butta for dayssss” ….it will take time for certain items to be made public ready. I am in the process of figuring out relocating (moving half way across the world) so I need set myself up with a space that I know I will be in for a while before I can start bulk ordering things. Initially I am starting off with my handmade up-cycled earrings (I have a few photos of them in this post) along with a few handmade accessories such as necklaces & chokers.
The plan is to have a fully functioning online store that will provide handmade hair & body products (natural based) along with accessories that are Eco-conscious. So as of June (God willing) my online store will start operating and as I mentioned items will be added as time progresses.
Please remember to follow me on all my social media pages because I tend to post a lot on my Instagram and Twitter (news tends to hit there first). If you don’t already follow me on YouTube please do because I plan on doing more DIY’s now that my focus is back.
Once again thank you to everyone that’s been my cheerleader, your words of encouragement definitely have not been ignored, if anything they helped motivate me.